How do I manage the customized blacklist and whitelist in the anti-Spam System?
The anti-spam system provided by the Center allows users to use notification mail or the mail reporter to set customized blacklists and whitelists. Email from whitelisted senders are always considered valid, while email from blacklisted senders are marked as spam. (Since the Center’s SMTP server is whitelisted by default, adding this server on your customized blacklist has no effect). Users can add important contacts to the whitelist to avoid emails from said contacts being sent to the spam folder. Whitelisting can be done in the following way:
I. By notification email
 [Bug Report 2011/03/11] If the email address is longer than 55 characters, an error will occur when configuring the blacklist or whitelist, since the address will be cut off at 55 characters. This problem has been reported to the vendor. Please use the 2, web management interface to manage your black and white lists until the bug is fixed. Thank you!
Configuring the whitelist
To configure the whitelist from the daily anti-spam notification email (as seen below), follow the steps below to select the specific emails and tell the system you wish to accept all emails coming from these senders without filtering.

- Select emails from senders you wish to add to the whitelist.
- Select “White+Resend.”
- Press “Submit” If successful, the following will be displayed.

- To confirm a successful addition to the list, you can check directly in the 2, web management interface to see if the sender has been successfully added to the black or white list.
II. From the web management interface
Enter the settings screen
- Click “Mail Account” at the bottom left.
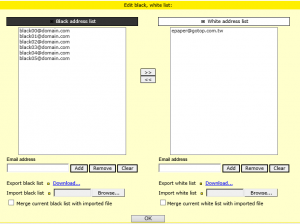
- Click “Edit Black/White List” at the top.

Black and white list format
In the black and white lists, there are two types of sender format you can enter:
- 「xx@xx」: Complete match of the sender’s email address.
- 「@xxxx」: Match the sender’s domain only.
- For details, please see Mail Reporter End-User Guide v3.9.5 Note: 2016/3/11 - there is an error on page 19 of the document. Personal users may not use the following 3 conditions:
- 「xxxx@」: Match sender name only.
- 「xxxxxx」: Partial match of the sender’s email address.
- IP address: IP address match.
Configuring the white list
- Enter the email address to be added to the white address list (e.g., “White2@domain.com.tw”)
- Click “Add” and the email address will appear in the white address list.
- Confirm by clicking “OK”.

Configuring the Blacklist
- Enter the email address to be added to the black address list (e.g., “Black2@domain.com.tw”)
- Click “Add” and the email address will appear in the black address list.
- Confirm by clicking “OK”.

Importing a Blacklist
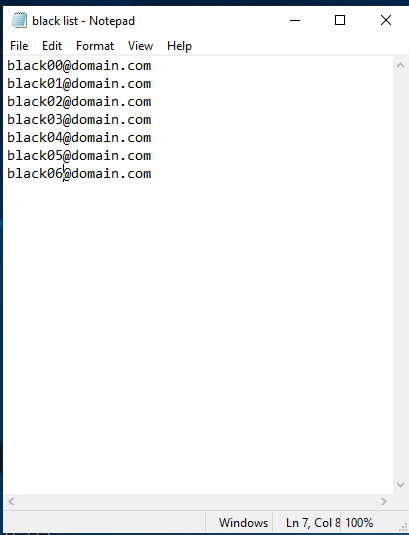
Step 1
- Edit the blacklist file as shown below.

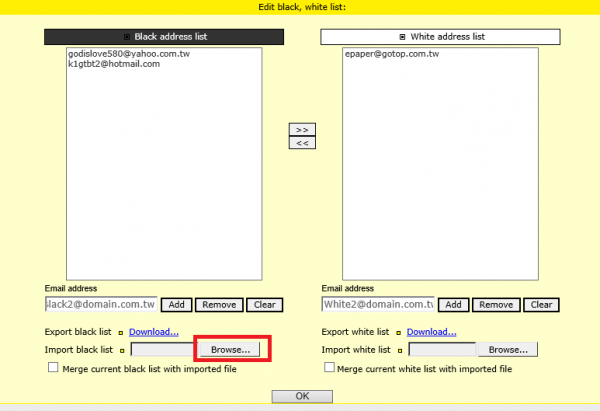
Step 2
- 1. Enter the configuration screen and click “Browse”.

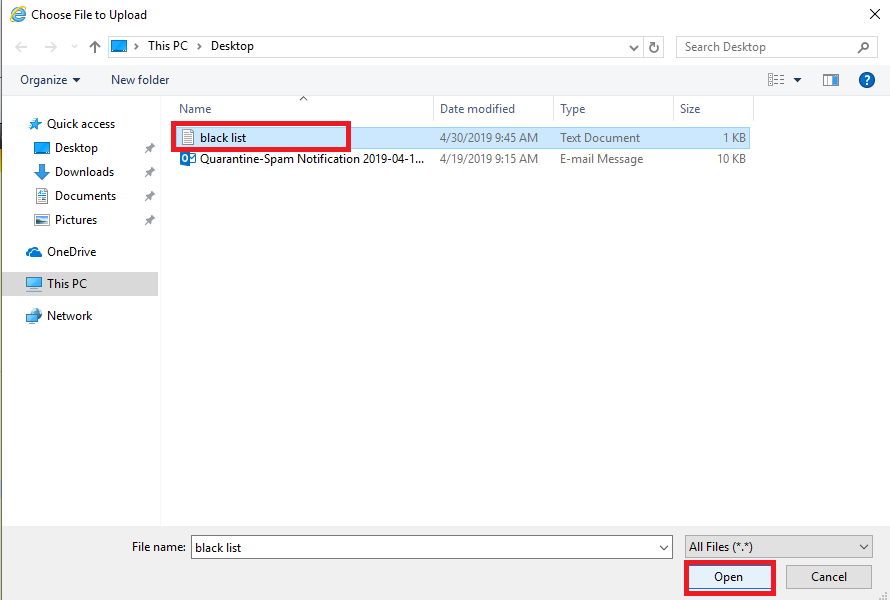
Step 3
- Select the directory where the file is located (e.g., C:\Users\yschen\Desktop\black list.txt)
- Select the file to be imported (e.g., “black list.txt”)
- Click Open.

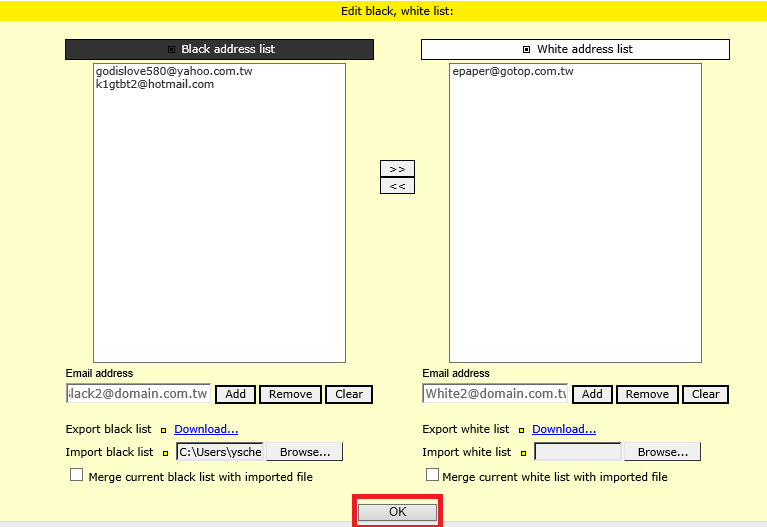
Step 4
- Confirm by clicking “OK”.

Step 5
- When you have completed the import, you should see the following.

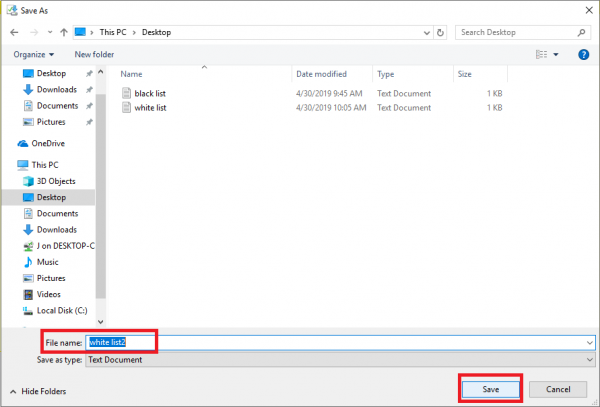
Exporting a white address list
Step 1
- Go into the configuration screen, click “Download…,” which is located next to “Save as”.

Step 2
- Select the path where you want to save the file (e.g., C:\Users\yschen\Desktop\white list2.txt)
- Enter the desired file name (e.g., “white list2.txt”)
- Click “Save”

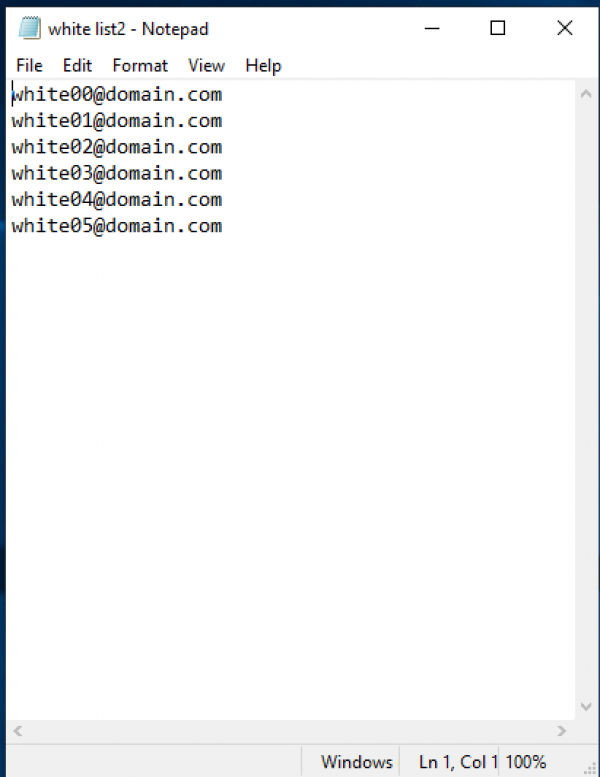
Step 3
- The figure below shows the exported whitelist.

Configuring black or white lists from epecific emails
- Click “Mail box” on the bottom left.
- Find the email you want to add, click “Add to Personal BlackList” or “Add to Personal WhiteList” to add to the black or white list, respectively, then use the method above to see whether the addition was successful.
