Installation and Use Instructions of Ivanti Secure Access Client or Pulse Secure on PC
Read Before Installation
- Please refer to TWAREN SSL VPN Service Information
- For use by University faculty, staff, and students with a 「campus wireless LAN account 」only.
- Account:
username@wlan.nthu.edu.tw, please enter whole name.
Ivanti Secure Access Client or Pulse Secure Manually Download & Setup
Download either Ivanti Secure Access Client or Pulse Secure
- Please download either Ivanti Secure Access Client or Pulse Secure setup file for each platform(login password: nchc), and install it mannually.
Setup either Ivanti Secure Access Client or Pulse Secure. Take Pulse Secure for example
- Step1: Check installation version
- If Pulse Secure has not yet installed on your computer, please jump to Step3.
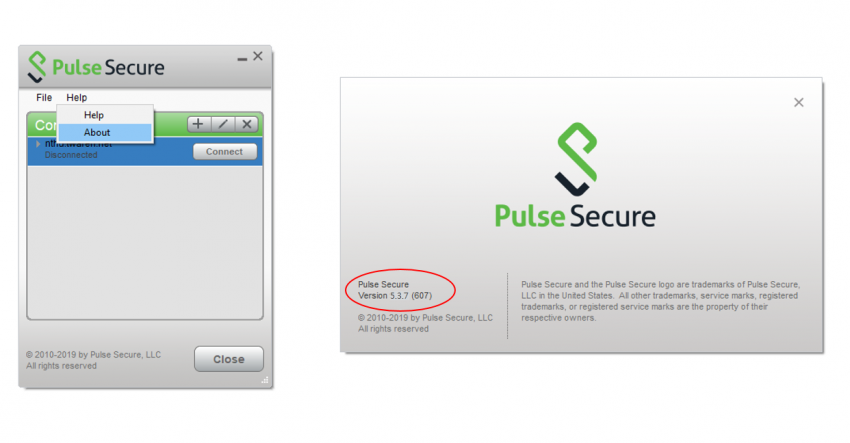
- Otherwise, run the Pulse Secure and click 〔Help〕→〔About〕to view the version. If the version is older than '9.0', continue to Step2.
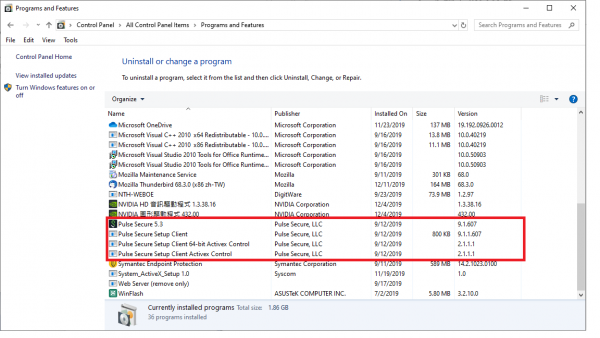
- Step2: Uninstall the previous installed Pulse Secure version and its related program. Take Windows for example:
- Open 〔Control Panel〕→〔Programs and Features〕
- Select Pulse Secure related software.
- Click 〔Uninstall〕.
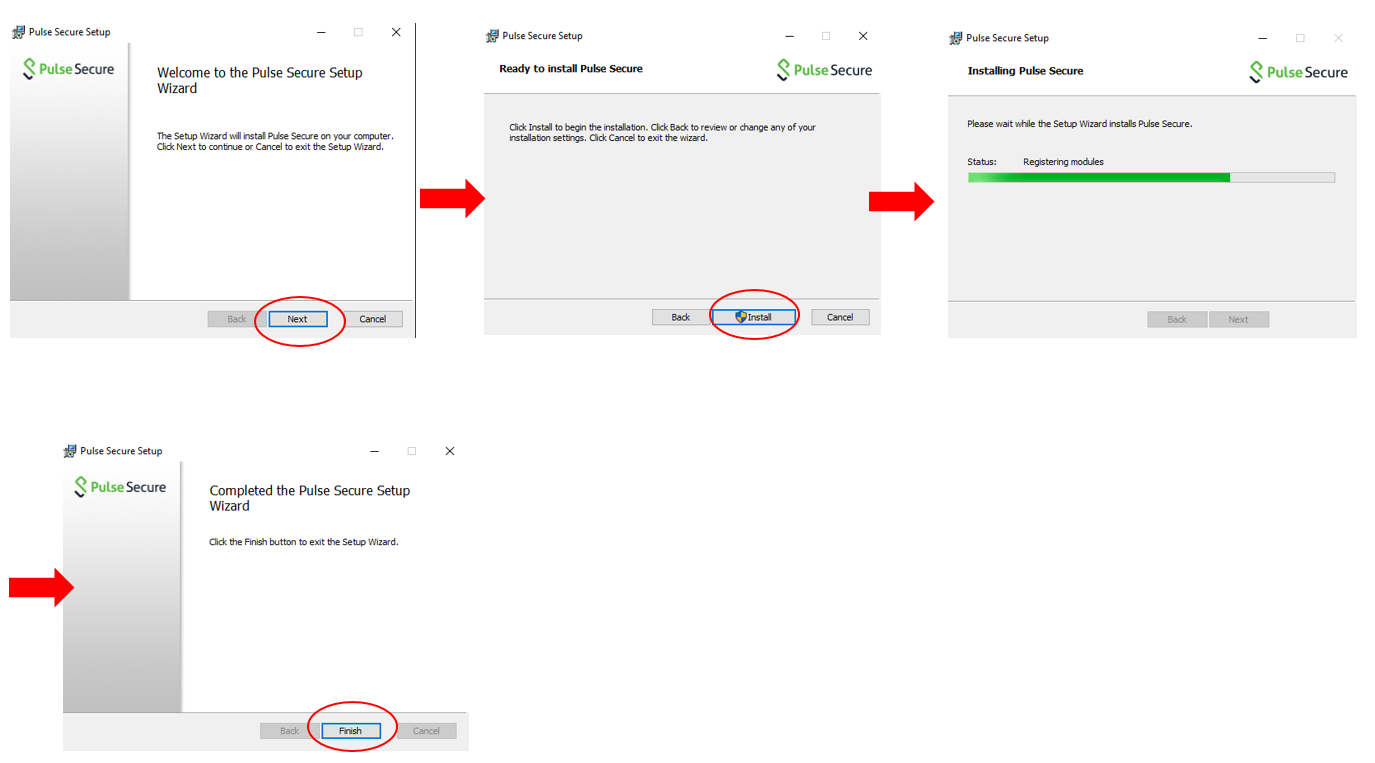
- Step3: Open the downloaded Pulse Secure setup file and install it by the following steps.
- Step4: Run the Pulse Secure and click 〔Help〕→〔About〕to confirm that the version. (Same steps shown in Step1(2))
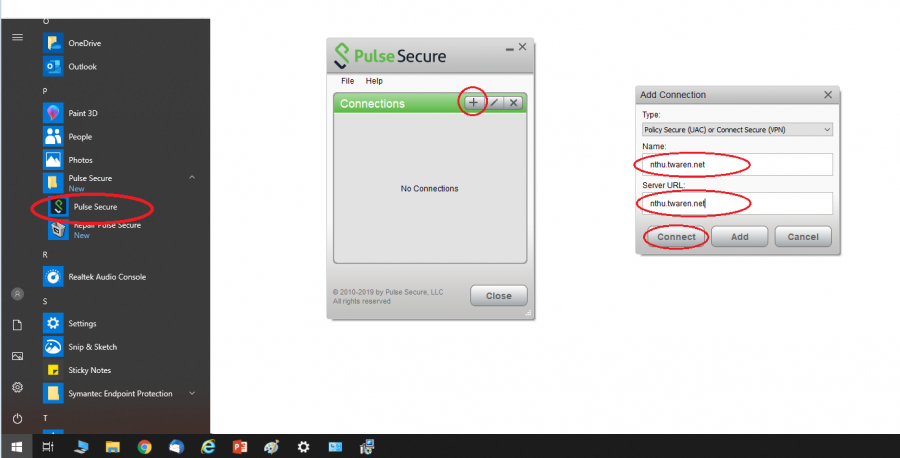
- Step5: Before connecting SSL VPN, the following configurations might be requested.
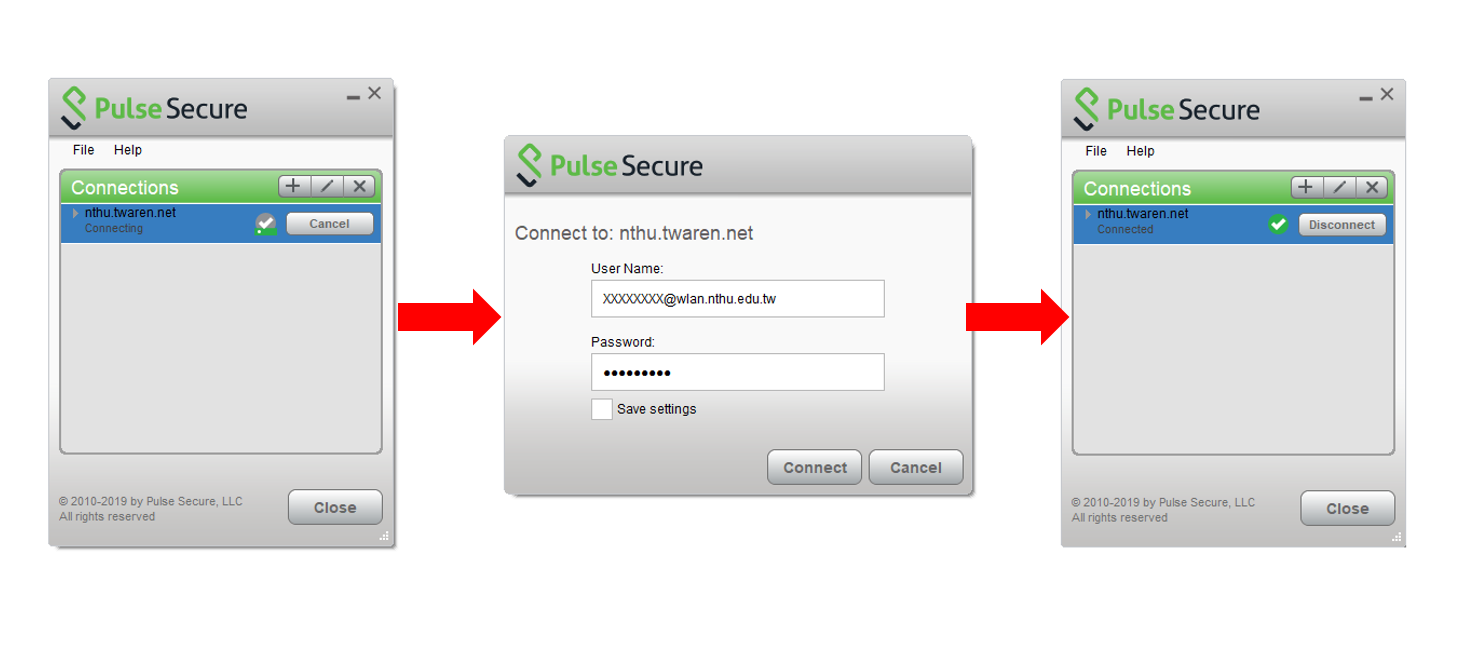
- Click 〔 + 〕 button, enter “nthu.twaren.net” in the fields of 〔Name〕 and 〔Server URL〕.
- Click 〔connect〕.
- Step6: For authentication, enter campus wireless LAN account and password.
- Step7: Verify the Pulse Secure is running successfully by checking the status of Pulse Secure process in the right bottom of the screen.
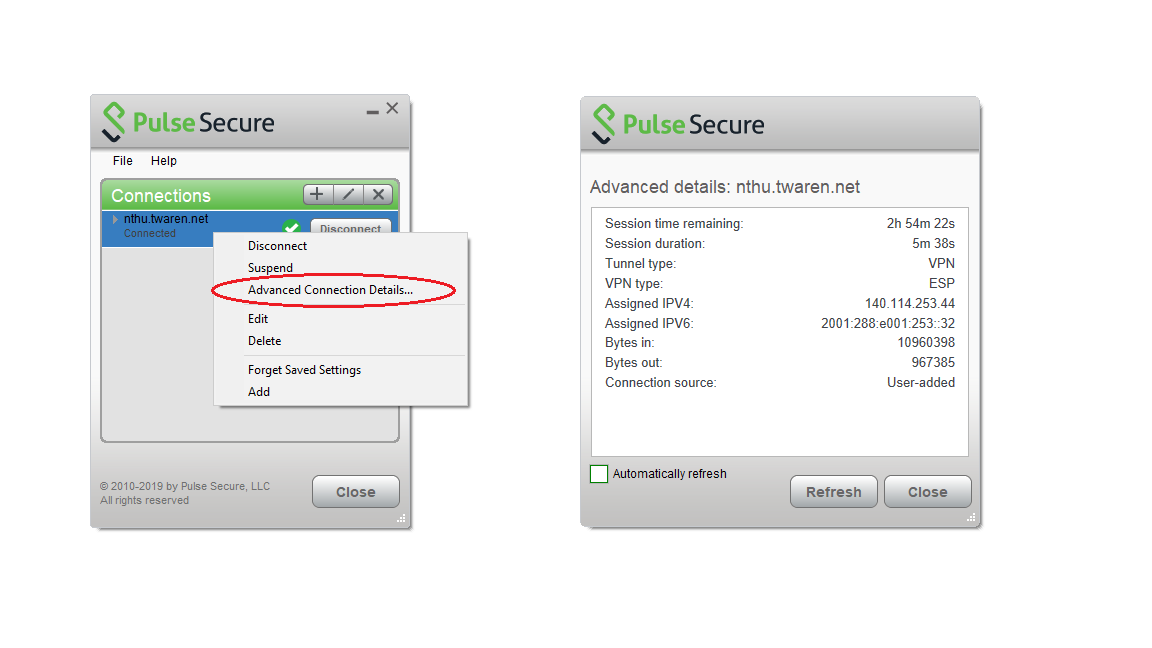
- Step8: View the connection information of SSL VPN.
- Step9: To run Pulse Secure again, follow the authentication steps shown in Step5 ~ Step6
