Roundcube Webmail
- • Since the current iloha Webmail system is overly simplistic,Roundcube Webmail has been introduced to replace the current system and improve the webmail system's functionality. Roundcube provides new functions, such as a multi-language interface, a richtext/html mail editor, and drag and drop mail management. On January 4, 2016, the system went live and was publicly tested with faculty and staff email (mx), and unit email (my). Student emails are gradually being brought online, as shown in the list below:
- Faculty and Staff:https://mx-mail.nthu.edu.tw/
- Units: https://my-mail.nthu.edu.tw/
Roundcube Webmail Setup
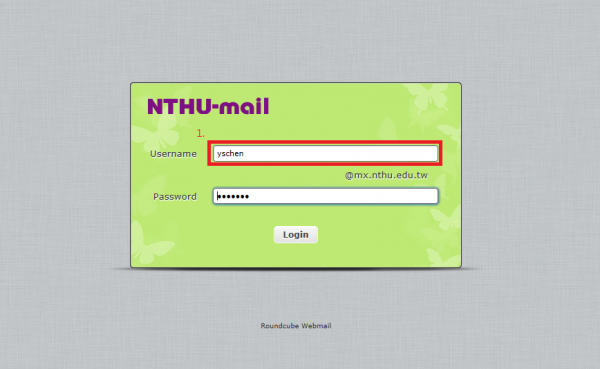
Login Screen
Page Setup
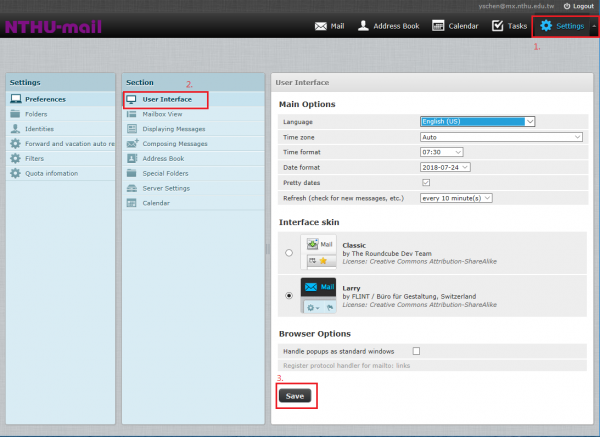
- After logging in, select “Settings”。
- First select “Preferences”
- The main settings include language, time zone, time format (how time is displayed), date format (how the date is displayed), short date display (whether to display the full date), and others.
- Page style::
- Click “Save” to save your settings.
- As shown:
Mailbox display settings
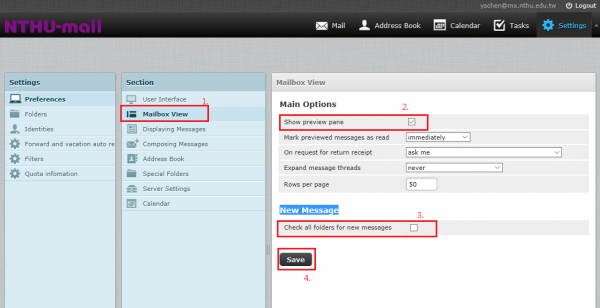
- Click “Mailbox view.”
- The main options include “show preview pane”, “Mark previewed messages as read”, …, “Rows per page”.
- New Message:“Check all all folders for messages”.
- Click “Save” to save your settings.
- As shown:
Displaying Messages
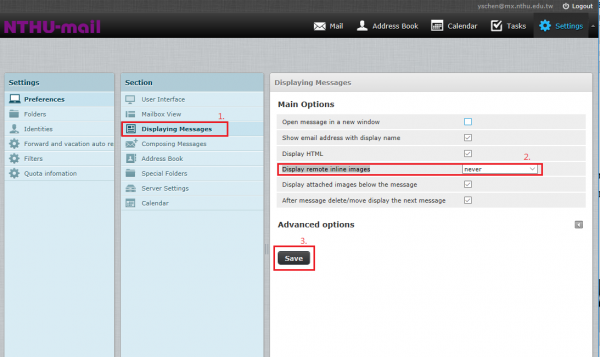
- Click “Displaying Messages”.
- Main Options:“Open message in a new window”,“Show email address with display name”,“Display HTML”,“Display remote inline images”(for retrieving remote pictures, “Never” is recommended).
- Click “Save” to save your settings.
- As shown:
Folder Settings
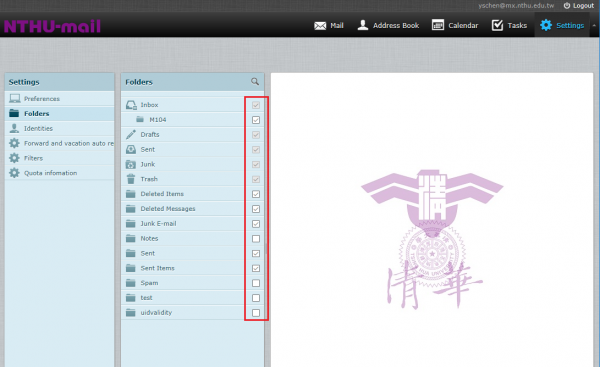
- Select “Folders” in the settings page.
- Select the folder you wish to read. If you are not sure what folders you wish to use, select all before choosing.
- As shown:
Personal Information Settings
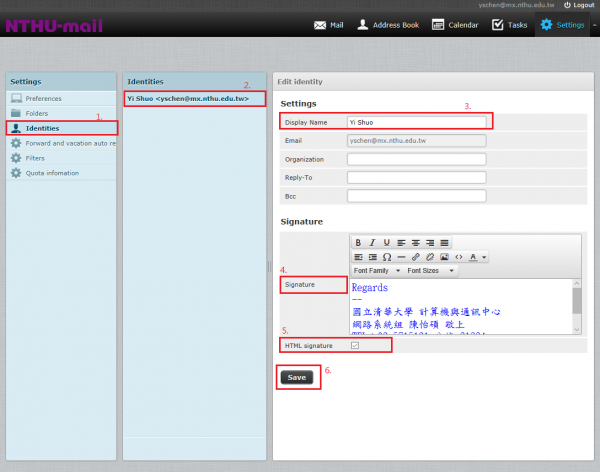
- Select “Identities” in the settings page.
- In the Identities field, select “email address.”
- Settings: “Display Name” (user-defined), “Organization”.
- The user may edit their own signature.
- Use an “HTML signature” (the user may choose their own font).
- Click “Save” to save your settings.
- As shown:
Forwarding and Vacation Auto-Reply Settings
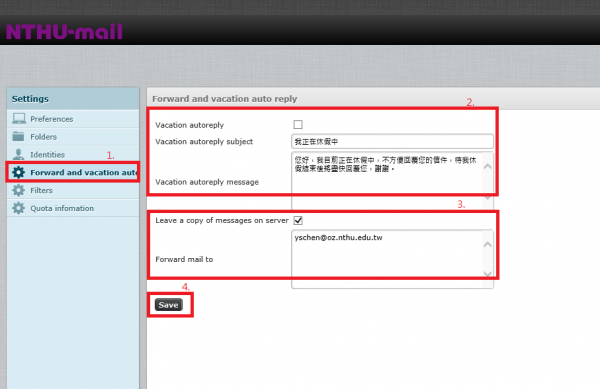
- On the settings page, select “Forward and vacation auto reply.”
- If you wish to use the vacation auto-reply function, please check the box.
- If you wish to use the forwarding function, please fill out the form listing the forwarding email addresses. Up to 20 email addresses may be used for forwarding.
- Click “Save” to save your settings.
- As shown:
Filter Settings
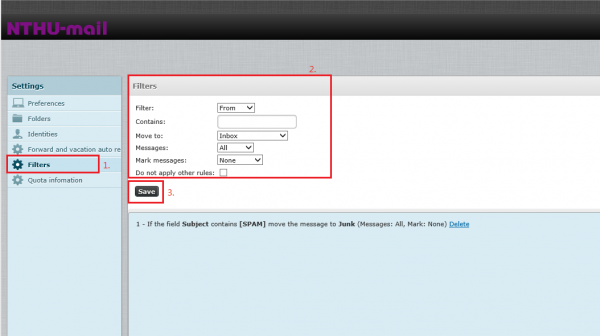
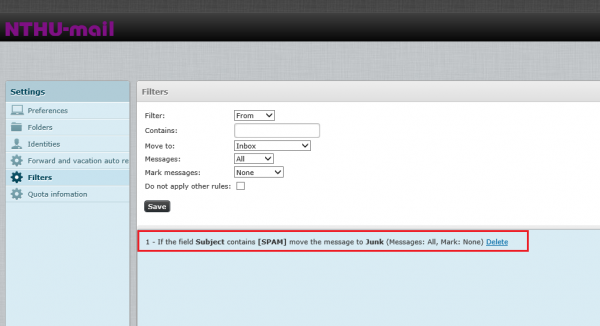
- On the settings page, select filter (mailbox rules).
- Search field: “sender,” “recipient,” “copy recipient” and “subject”.
- Including: Which words or sender names will be included.
- Move to: Move all mail matching the search terms to a designated folder.
- Mail count: All mail, read mail, unread mail.
- Mark the mail selected: Mail matching the search terms is labeled as “read,” “unread,” or “none” (no mark).
- Do not apply other rules: Do not apply other mail rules.
- As shown:
- Click “Save” to save your settings.
- After saving, a rule will appear in a dialog box, as shown:
Instructions on how to use the Roundcube Webmail
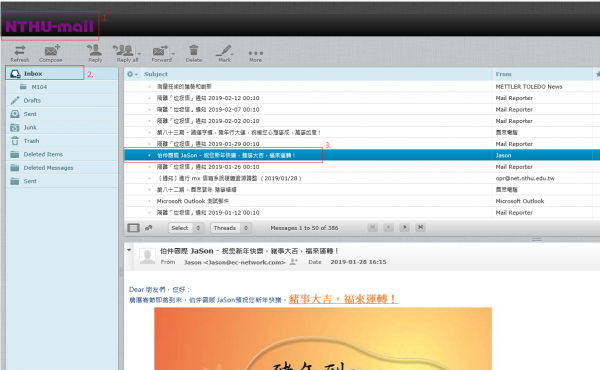
- Select “NTHU-mail” then click on “folder,” then select the mail, as shown in the pictures.
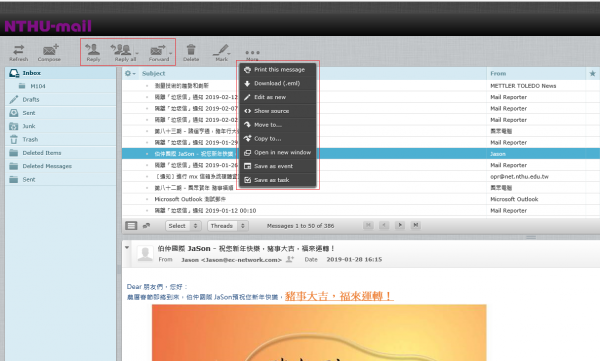
- Mail function list, which is applied to the selected mail, is shown in the picture.
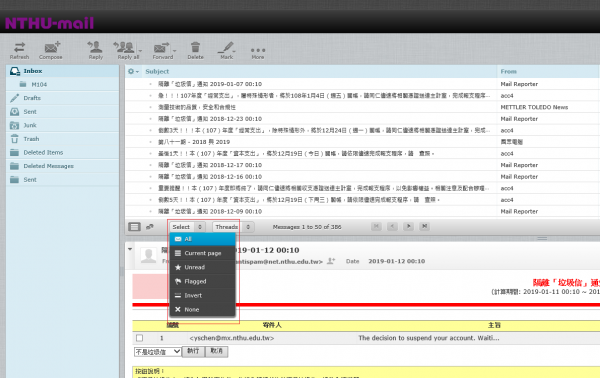
- How to select mail: Function keys can be used to select all mail. The “ctrl + mouse click” can also be used as well, as seen in the picture:
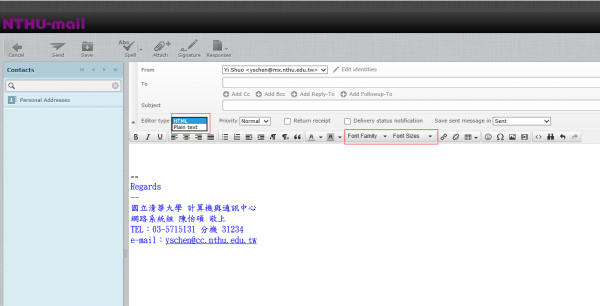
- How to write emails: You may select the editor type. If you select “plain text”, you will not be able to change the size, color, or font of your text. If you choose HTML, the font size, color, and font may be changed.

