Campus Wireless LAN Authentication Method
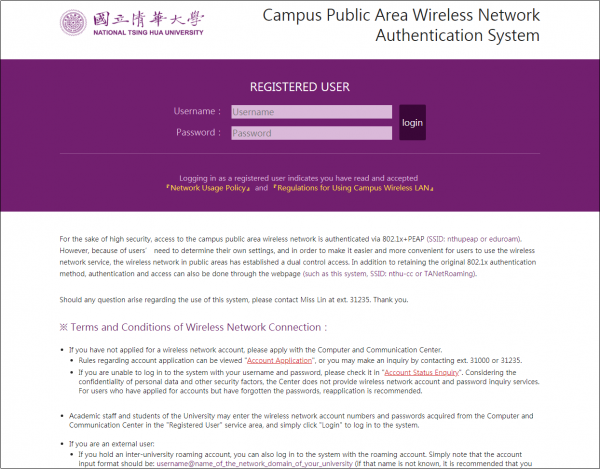
Every user must be authenticated before using the campus wireless network service. Users are asked to enter their Campus Wireless LAN Account information. After authentication, the user may use the campus wireless network services. The interface for entering account information will differ depending on the method of authentication. An example using the campus public area wireless LAN is given below:
- Web-based authentication: The connection name is nthu-cc or TANetRoaming. No extra setup is necessary.
- All the user need is to open a browser window (e.g., Microsoft Internet Explorer, Mozilla Firefox,…), go to the authentication page, and enter their wireless LAN account username and password. Once successfully authenticated, the user may then use wireless internet.
- Authentication procedure: (Obtain IP address before authentication)
Connect to a verified wireless SSID on campus. Once you have obtained an IP address (i.e., your wireless network status is “connected”), open a browser window, where you will see the following authentication page. Enter your wireless network username (Staff ID or Student ID) and password, then click “login.” Upon successful authentication, the browser window will be redirected to the NTHU homepage, meaning that your internet connection is working.
- TANetRoaming: Taiwan Academic Network WiFi Roaming. For details, please see Taiwan Academic Network Roaming.

- 802.1X + PEAP Authenticating: The connection name is nthupeap or eduroam . Additional setup is necessary.
- Connecting to a different network name requires separate setup using the same steps. For the same network name (e.g. “nthupeap”), you only need to setup once. After setup is complete, enter the wireless LAN account username and password for the authentication. Once successfully authenticated, you may use wireless internet. Please refer to the setup procedures and explanations according to your operating system and version: For users of Windows / macOS / iOS / Android.
- Authentication procedure: (Authenticate before obtaining an IP address)
Connect to a verified wireless SSID on campus. After completely they setup, a dialog box will appear (shown below) where you can enter your authentication details. Enter your wireless network username (Staff ID or Student ID) and password, then click “OK”. If your wireless network status changes to “connected,” that means authentication was successful and you may access the internet.
- Authentication in non-public areas (e.g. Wireless LAN setup per department) is roughly the same as the two methods described above, though settings and usage may differ slightly (for example, the connection name). For details, please see a verified wireless SSID on campus, or ask the administrator of the department office.