FTP connection setting
- FileZilla can be connected in two modes: quick connect and site setting. The quick connect mode is rather convenient as it can keep the recent settings of connection temporarily. If you want to use several connections of different IPs, please use the site setting modes to manage the connections of IPs.
 Here we use FileZilla to demonstrate FTP connection. You can also use other FTP software. If you need to install FileZilla, please refer to the installation guide: Installation instructions for FTP software "FileZilla".
- Students’ FTP server: the account and password of ftp.oz.nthu.edu.tw is the same as the setting of e-mail address.
- The FTP server for Faculty members and Staffs: the account and password of ftp.mx.nthu.edu.tw is the same as the setting of e-mail address.
- The FTP server for administrative and teaching units: the account and password of ftp.my.nthu.edu.tw is the same as the setting of e-mail address.
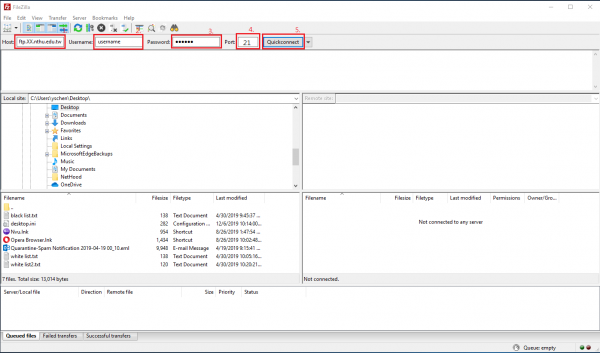
- An example of setting is shown below
Host:ftp.XX.nthu.edu.tw
Username:username
Port:21
Quick connect
- First Open FileZilla and fill in the host IP address in the window.
- Enter the username which is the same as your e-mail account.
- Enter the password which is the same as the password of your e-mail account.
- The default port is “21”, so you don’t have to enter it here.
- After you finish all, you can click on 〝quick connect〞 as below.

Setup FTP Site
Step 1
- After opening FileZilla, find the “Open the Site Manager” icon in the window and click it, as shown below.


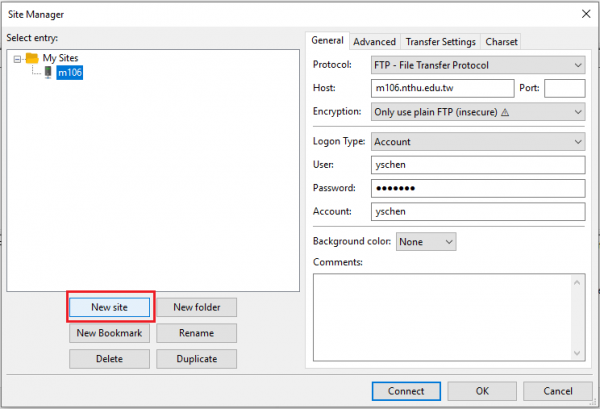
Step 2
- Click “New site”, as shown below.

—-
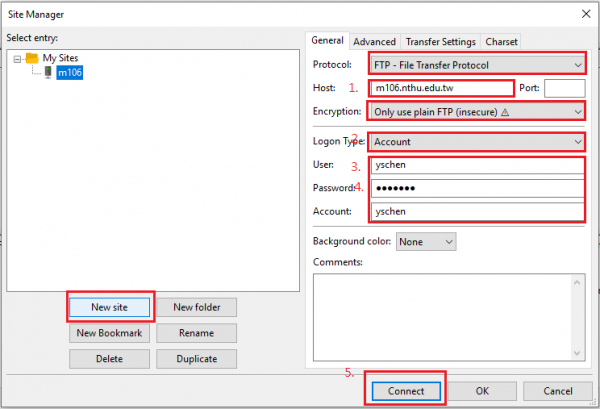
Step 3
- Enter the host IP name on the right side of this window, here is “XX.nthu.edu.tw” as an example.
- Select “Account” as the login type.
- Enter the username which is the same as your e-mail account.
- Enter the password which is the same as the password of your e-mail account.
- Finally click “OK” to establish the platform. When you use it later, just click the link to use it, as shown below.